Feeds:
Posts
Comments

Stone Soup…

I’m actually not a soup person, really. Well, maybe it turns out that I am, but only sometimes, and with certain soups. Most soups leave me unfulfilled, dissatisfied, disgruntled, unhappy, discontent. (Hello, you’ve reached the winter of our discontent).  So many soups don’t have enough zing! Also, so many soups don’t leave me feeling full. Soup is not a meal, I say! Soup is a first course! Soup is a side dish! But I seem to have proven myself wrong, as of late. Soup can be a solid (liquid!) meal, and soup can have zing.

Shelling beans from CSA that went into my most recent pot of stone soup. The best part of these shelling beans is that you never know what will be inside each pod – a kidney bean? a white navy bean? a black bean? I feel like Forrest Gump on chocolates.

I don’t remember how it started. I think my renewed faith in soup started when I made this in September, and paired it with delicious grilled cheese sandwiches, rather than doing the cheddar lid thing. Then I thought my stone soup started when I had to provide 8 ladies with food for a book club meeting (Yes, I am a housewife in her 50s, what’s it to ya?) but then I remembered that wasn’t the first time I’d made this soup. The first time I made this soup was probably some late September Tuesday evening, when I got home after picking up my CSA and didn’t have much of an idea about what to make for dinner, so just threw some stuff in a pot and away we went. That’s what this is. But that night – a revelation – this soup was GOOD. While this soup is meant to be made with whatever veggies you have, and a bean or lentil to make it more of a complete meal, there are three four things that elevate this soup to delicious, and I will share them with you here.

Onions and carrots, the birth of soup.

Start this soup like any soup – sauté some onions, carrots and throw in some garlic. If you have celery or celery root, all the better. If you have ginger, go for it. If you have a can of tomatoes you want to throw in, by all means. There are no rules, really. Then I usually throw in some combination potatoes, sweet potatoes, and/or squash, all cut into relatively small cubes so that they don’t take too long to cook. I through in a half cup or more of a lentil, and then make sure I add enough broth/water to give all those things enough moisture to cook. Simmer away. Now here’s where the tricks come in.

1) Roast a pepper in your oven. I personally only like roasted peppers when they are made at home, rather than coming from a jar. My method is that I cut the pepper in half, rip out the seedy parts and rub both sides with oil – I usually use olive oil, but I’ve been meaning to start using sunflower oil because it has a higher smoking point and that way I won’t set off my smoke detector anytime I roast a pepper. Place the pepper skin side down on a small baking sheet and put it in the oven at 400. When the skin starts to become blistered and black (10-12 minutes?) flip the pepper and put it back in for another 5-10 minutes until it is all soft and wrinkly and roasty and good. As always, oven times may vary, so keep an eye on that bad boy. When it is done roasting, chop it up into a few pieces and set it aside. I’ll let you know what to do with it soon.

Some squash and a pepper to roast for soup. You don’t need to pre-roast your squash, I was just feeling sassy.

2) When your potatoes/squash/whatever and your lentils or beans are fully cooked and softened, ladle out a bit less than half of the soup into a large glass measuring cup.  Throw the roasted pepper into the soup that remains in the pot, and puree it with an immersion blender (I love my immersion blender so much!). Add the ladled-out soup back into the pot. Now you have a soup that is mostly smooth, but with some chunks still to give it texture! And also a roasted pepper is hiding in your soup!

3) Lemon juice. So much lemon juice. I don’t know an exact amount, because I just liberally glug it in until it tastes right, but I probably put almost 1/4 cup of lemon juice into a big pot of soup. Never underestimate the power of lemon juice. I didn’t go to culinary school, but I know people who did, and this is an age-old trick. They’ll tell you that it really “brightens” the flavours of your soup, and that is exactly what it does. Trust.

4) I just remembered a fourth trick, one that I only discovered on my most recent pot of soup, but it will now be part of my soup routine. Miso paste. Avoid seasoning your soup much while it is boiling all those veggies and lentils, and then dissolve a bunch of miso paste in some hot water or some of your broth, and mix it into your soup at the same time that you are adding your lemon juice. The miso adds quite a bit of salt and flavour (umami!) to the soup, so hold off on adding any salt (beyond what’s in your broth) until after you’ve done this. I still usually add some spices, but you may not need them.

And that is how you can turn an onion, carrots, garlic, lentils, a pepper and a bottle of lemon juice into dinner. That is stone soup, which I think is also one of the most beautiful folk tales that pretty much hits the nail right on the head when it comes to food security and building community. And if you want another way to build community, just walk around carrying something like what is pictured below. Strangers will talk to you, I promise.

Yes, that is a branch of brussel sprouts. And yes, I use my cat for scale.

Birthday Buckeyes…

This time, let’s just skip the whole I’m-sorry-I-haven’t-posted-in-so-long bit, and cut right to the chase – because these are delicious and you really shouldn’t waste any time waiting to make them.

But first, a story (hey! I thought she was cutting right to the chase!). Two years ago, Smitten Kitchen published a recipe for Buckeyes. Although I grew up not too far from Ohio, and though I have grown up to realize that many of the traditions, products, etc. that I grew up with are more firmly rooted in Michigan or Ohio than in the rest of Canada, I had never heard of any dessert buckeye. They had peanut butter, they had chocolate, I made them almost right away. Now, don’t get me wrong – they were terribly delicious and I don’t remember having a single complaint about the taste of those delectable treats. BUT I did find them to be a pain in the ass to make. I suspect this is mostly because I do not own a KitchenAid mixer, so instead was using my regular electric beaters to make them. Let me tell you – that made one hell of a mess. Peanut butter and icing sugar all over my kitchen walls, no word of a lie. And the whole dipping-them-in-chocolate thing, trying to cover *almost* all of the peanut butter balls, using some kind of long skewer and trying to angle it into the hot chocolate….well, I remember being frustrated.

When Paul requested these for his birthday dessert this year, I was excited to eat them but less excited to make them, until I realized something about myself: I am a perfectionist in the kitchen. That’s not a new realization, though. The new realization is this: if something is supposed to look a certain way – a certain polished way – I am going to get frustrated trying to achieve that perfect, polished look. But if I don’t have an image in my head of what the food is supposed to look like, if I decide that it’s going to be rustic – things go really smoothly, and actually usually end up looking pretty beautiful. So when you go forth and make these, don’t fret – they will be delicious and beautiful no matter how you go about it.

Birthday Buckeyes or Paul’s Birthday Balls (snicker)

adapted from Smitten Kitchen

Yield: about 55, but this would vary depending on the size of your balls (haha, again!)

I made several changes from the original recipe, both in terms of ingredients and in terms of process. Firstly, I used natural smooth peanut butter. Because of this I added a bit of maple syrup to the peanut butter, but as it turned out I still used far less sugar than the original recipe called for. While I started out using my electric beater again (beating the peanut butter and cream cheese together, and the graham crumbs for a few seconds) I ultimately abandoned it for a wooden spoon, and then, my hands. The more I cook and bake, the more I realize that I prefer using my hands for so many tasks. Lastly, I used far less chocolate, mostly because Paul had requested them to have less chocolate – since I wasn’t trying to cover the whole thing with chocolate, I used a different method for coating them. In the end, these came together so quickly and painlessly – and this can only mean that it will be far less than two years until I make them again.

1/4 cup cream cheese, softened

1 1/2 cups natural (unsweetened) smooth peanut butter

a very generous glug of maple syrup, probably 1/4 cup worth

1 cup graham cracker crumbs

1 to 1 1/2 cups icing sugar

5 ounces/1 1/4 sticks/10 tablespoons/a bit more than a half cup of salted butter, melted and cooled

5-6 squares of semisweet baking chocolate, coarsely chopped (I actually melted 10 squares, but have an insane amount of melted chocolate left and no purpose for it – you may want more chocolate if you want to try coating them more completely)

1. Beat together the peanut butter, cream cheese, and maple syrup.  Add the graham cracker crumbs and beat for a few seconds. NOW GET RID OF THOSE BEATERS before you just make a bigger mess than you already have. If you do have a proper standing mixer, than by all means use it for this.

2) Add the icing sugar, 1/4 cup at a time, mixing with a wooden spoon or your hands, until you find the mixture to be sweet enough and the right consistency to be able to squeeze and roll into balls. I used barely more than one cup.

3) Line a couple of baking sheets with parchment paper. Break off tablespoon-ish size pieces of dough, squeeze together so that it doesn’t crumble, and then roll it into a ball with your hands. You can certainly change the size of the balls depending on your preference. Place peanut butter balls on the parchment lined baking sheets – they can be quite close together but you don’t want them to be touching.

4) Melt your chocolate in a double boiler until it is smooth. Turn off heat. Let cool for a bit (you can finish rolling out remaining peanut butter balls during this time, if you want). Using your fingers, take each peanut butter ball and dip it about halfway into the chocolate, being careful not to burn your fingers. If you are nimble enough, you can do your best to place them back on your parchment with the CHOCOLATE SIDE FACING UP – this way they won’t stick to your parchment, and the chocolate won’t pool or make a flat bottom. Continue dipping – you will need to rinse off your chocolatey hands every row or so – until all your peanut butter balls are coated. Place your baking sheets in the freezer for a half hour or so, until the chocolate is set. Put into an airtight container in the fridge and enjoy!

I think mine look kind of like little acorns – they don’t look like “buckeyes”, but guess what? I don’t even care. And there you have it! And so, I leave you with this little ditty, stuck in my head for the entire time I made these today (and if you’re anything like me, it was likely stuck in your head while you read this post).

Dudes, this is just a short little post to say: I JUST MADE PEANUT BUTTER.

I am feeling pretty all-powerful right now. Like most things I discover are really easy to make, I’m totally amazed and am also asking myself “why haven’t I always been making my own nut butter?! That was sooo easy!” And it really was, so so so easy.

The thing is, it’s not like peanut butter or other nut butters are all that hard to come by. And with things like almond butter, I wonder whether it would be any cheaper to make it at home, because almonds can be pricy. But with peanut butter it felt so worth it, and I’ll tell you why. I am ALWAYS having a dilemma about what kind of peanut butter to buy. All the brands like Kraft, etc. are delicious and I love them, but I usually don’t actually want to eat peanut butter that is that sweet all the time. And I’m often thinking to myself how much bad stuff is added in to those peanut butters. But then I’ll go out and buy the straight up just-peanuts natural peanut butter and be kind of bummed that there’s NO salt and NO sweetener. I admit that I like a bit of salt and sweet with my nut butter! So then I’ll start looking at brands like this one, which is definitely delicious, but then I’m all like “6 bucks for a tiny jar?! That’s highway robbery!” and so on.

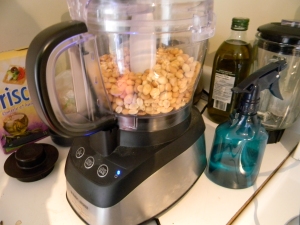
It’s a good idea to give your food processor some breaks now and then so you don’t burn out your motor.

But guess what? When you make your own peanut butter, you can put exactly what you want in it. Like this one, which has a bit of salt, is sweetened with a bit of maple syrup, and has a sprinkle of cinnamon and a splash of homemade vanilla extract mixed in, for extra delicious-ness. Cinnamon-vanilla-maple peanut butter. IT IS SO GOOD.

And all I had to do was put a bunch of peanuts in my food processor and whirl them around until they were buttered. So easy.

This here is a summer meal.

“But wait!” you say, “it’s only May!”.  Well obviously you didn’t spend last weekend in Toronto/Ontario/my sweltering apartment. So if May seems a little too early to be laying in front of a fan and spritzing water on yourself from the spray bottle normally reserved for punishing the cat, forgive me.  We’re waiting for the screens for our windows to arrive, and since my cat would likely launch herself out of our apartment in chase of birds if I opened the un-screened windows all the way, for now we sweat.

So yes, you may have heard that I moved again. Spare me the “you move a lot!” remarks if you please, because my past bunch of moves have been necessary and had you lived in two back-to-back (TWO!!!) cockroach-infested apartments with a host of other problems to boot, you’d move too. This is the first time in over a year that I’ve felt like I have a home I want to go home to, and it is an immense relief and such a burden lifted off of my emotional and mental health! I am also now embarking on the adventure that is cohabitation, so things are all new up in here.

The new kitchen.

But this is a food blog, not a blog about my life (or is it? are those things not kind of the same anyways?) I owe you a summery meal, and a summery meal you’ll get.

Well hello there, magnetic knife rack…

Last Friday I finally received my copy of Alana Chernila’s cookbook, entitled The Homemade Pantry: 101 Foods You Can Stop Buying and Start Making.  Very honestly, I can’t remember the last time I’ve seen such a beautiful cookbook. I sat down and basically read it cover to cover when I got home on Friday evening, and I rarely do that with cookbooks. I’m usually a page-flipper with new cookbooks. But time and time again, Alana’s blog has had these beautifully written pieces that say so much about food, so much that I wholeheartedly agree with.  I would be lying if I said that my eyes didn’t get a little welly-with-tears when I read certain pages of her book.  It’s wonderful, and on Friday night, I was inspired to start making more than just dinner. Saturday morning I bought rhubarb at the market, and will be making some more Rosemary-Rhubarb jam soon. But on Saturday, though none of the recipes came from her book, I made a summery feast.

Homemade veggie burgers, with homemade whole-wheat buns, maple-lemon fiddleheads (by Paul!) and homemade lemon ice cream. Nom.

Now, I won’t tell you about the burgers, because I’ve already written about them here. I’ll tell you about the ice cream and about the buns.

First, the buns. A confession: I’m a bread cheater, because I use a bread machine. I know that I could do it all without the machine, but the machine makes it SO EASY, and I have it, so I’ll continue to use it until I decide it is no longer fit for me. I adapted the bun recipe from here, primarily changing it to include more whole wheat flour and I used butter and some sunflower oil rather than shortening, because shortening is gross.

Whole Wheat Hamburger Buns for the Bread Machine

1 cup water

1 egg

1.5 cups all-purpose flour

1.5 cups whole wheat flour

3/4 teaspoon salt

1/4 cup softened butter (supplemented with a little bit of sunflower oil, because I didn’t have quite enough butter already softened, and I am now without a microwave and didn’t want to wait)

1/4 cup sugar

3 teaspoons yeast

1 tablespoon vital wheat gluten (optional)

I used the dough setting on my bread machine, and when it was done I punched it down on a floured cutting board and rolled into a kind of log. I cut it into 8 equal pieces, rolled those into balls, and flattened them slightly onto a parchment-lined baking sheet. I covered them with a towel and let them rise a bit more, then brushed them with some egg white, popped them in the oven at 400, and baked them for less than 10 minutes. They were DELICIOUS. I wanted to eat a million of them, but we only had 8 and they were gone so quickly. Thank goodness I’m not gluten-intolerant.

Insert “nice buns” joke here.

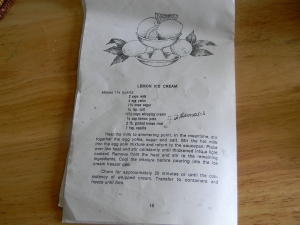
Now, the ice cream. The lemon ice cream. If you didn’t already know, lemon desserts are my favourite. For awhile, an old roommate of mine was calling me Liz Lemoncake, after I expressed concern that people would start complaining behind my back that I always make lemon cake. Obviously, my roommate told me I was crazy, and that people would be happy that I was bringing cake at all.  This lemon ice cream is my mom’s recipe. I grew up having it very rarely (because we didn’t use the ice cream maker that much) but remember it fondly. I have often tried to find an ice cream elsewhere that lives up to it, but have never found one – it is truly a rarety to find a lemon ice cream – not lemon sorbet, not lemon frozen yogurt, lemon ICE CREAM. It is tart and yet oh-so-creamy at the same time, and it is divine. Here it is, verbatim from my mom’s recipe (hope this one wasn’t a secret, mom!)

I think this recipe came with my mom’s ice cream maker?

makes 1 1/2 quarts
2 cups milk
4 egg yolks
1 1/4 cups sugar
1/4 tsp salt
1 1/2 cup whipping cream
1/2 cup lemon juice (approx 2 lemons)
2 tbsp grated lemon rind
1 tsp vanilla
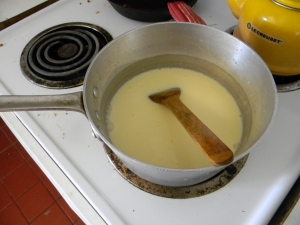
heat the milk to simmering point.  In the meantime, stir together the egg yolks, sugar, and salt.  Stir the hot milk into the egg yolk mixture and return to the saucepan.  Place over low heat and stir constantly until thickened into a light custard. Remove from the heat and stir in the remaining ingredients.  Cool the mixture before pouring into the ice cream freezer can.
Churn for approximately 20 minutes or until the consistency of whipped cream.  Transfer to containers and freeze until firm.
If you don’t have an ice cream machine, I can’t help you. Except that I can, if you are my friend and live in Toronto and want to come over for ice cream.

This Mother’s Day, I thought I’d do a lil roundup of Mom-focused songs – I love crafting a good party playlist, and while this isn’t exactly the same task, I also love the challenge of thematically-linked playlists. This is a short one, and it is not at all food-related, but it is topical.  You can also read an edited version of this post over at The LRMC, a great ladies bartering collective that I’ve contributed blog posts to before.

Where You Lead – Carole King 

Admittedly, I am compelled to include this song because I have been watching a lot of Gabmore Girls lately, and I really like the story behind this song’s association with the show.  When Carole King recorded this song, it was meant to be about her (male) love interest; with the rise of second-wave feminism, King decided that she felt uncomfortable with the message of the song, and stopped performing it live shortly after its release. Decades later, she re-recorded the song for Gilmore Girls, and this time re-imagined it slightly and recorded it with her daughter, Louise Goffin. And so, the song was renewed as a song about a caring and supportive mother-daughter relationship.

Dear Mama – 2Pac

This is a song that my brother often uses to try and convince his mother (and my stepmother) that just maybe she might like hip-hop. With the spoken refrain “You are appreciated”, this song is one of 2Pac’s more sentimental songs – a presumably auto-biographical song where 2pac reflects on the challenges his mother faced raising Tupac and his sister. This song is not all sentimental sap though, there’s a fair bit of social commentary embedded within it as well – while Tupac does describe some of his own disobedience and the pain it may have caused his mom, most of the challenges described have a lot to do with systemic and systematic barriers that effect racialized, low-income families and single parents in North America.

Mother and Child Reunion – Paul Simon

Catchy as hell, this song is also star-studded; Paul Simon recorded it in Jamaica accompanied by members of Jimmy Cliff’s band (who also played with Toots & the Maytals) and with backing vocals provided by Cissy Houston, the mother of recently-deceased and much-beloved Whitney Houston. A quick google search tells us that Paul Simon wrote this song after the death of his family dog (presumably then, the mother and child reunion is his family dog reuniting with its mother in your chosen afterlife scenario) but also that he was inspired by a dish in a Chinese restaurant. “A dish in a Chinese restaurant?! Huh?” you say? Apparently Paul saw a menu item in said restaurant that was called “Mother and Child Reunion” and was made up of Chicken and Eggs. If that’s not one of the most clever-yet-macabre jokes you’ve ever heard of being on a restaurant’s menu, I don’t know what is.

Stacy’s Mom – Fountains of Wayne

I don’t care for this song very much, actually, though I think it’s mostly the chorus that irks me. That said, I thought that perhaps I would be remiss if I didn’t include a shout-out to all the bodacious mom-babes out there. After all, a mere 15 years ago nobody had ever heard or used the term “MILF” and now, like “cougar”, it’s common parlance. Most of us have known at least one Julie Cooper-style mom in our lives, and I think that these women are often treated/portrayed in the media as bad moms. As if being an attractive, single, and sexually active woman and being a good mother are mutually exclusive?! Damn, patriarchy’s the worst, amiright?!
Good Mother – Jann Arden

I’m ending with this one because this is the song that, for me, is the perfect Mother’s Day tribute song. I do have a good mother – a great mother – and I think that Jann’s lyrics sum up how simple really good advice can actually be – “Feet on ground, heart in hand, facing forward, be yourself.”  I saw Jann Arden live in the early 2000s with some of the best friends a girl could ask for (“I’ve got a friend who loves me”) and I often remember that concert when I hear this song in particular. Those friends are still a big part of my life, and while we have all been lucky enough to have some seriously bad-ass damn Good Mothers, we’ve lost a few of those moms over the years. Mother’s Day is not an easy day for everyone. So folks, honour your Moms year-round, not just this Sunday – and take care of yourselves, your friends, and the rest of your family too.

And if all else fails, listen to Jann.

My So-Called Life…

Folks, this is an apology – it’s not my first one, and I feel certain that it won’t be my last, but here it is nonetheless. My life has felt crazy lately.  If you didn’t already know, I’m in teachers’ college this year, and it has been kind of a rollercoaster of stress – calm moments, vacation-y moments, followed by all-consuming stressful moments that seem to last much longer than the easy times. I just finished my second round of practice teaching, and it was fantastic, it really was. I had an a great experience, met some amazing teachers, had wonderful classes of kids who worked brilliantly at reading, understanding, and making meaning out of Shakespeare’s Othello. It was really great. It was also exhausting. I was at school most days by 7:30am, which meant getting up around 6:15 Monday-Friday. That kind of early is not for me. Now I’m back to my regular university classes for a few weeks, and then an internship. I’m also moving again at the end of this month. Before you say something like “you move a lot!” just know that I HATE moving, that my housing has been precarious for the last couple of years because of my finances, and because of apartments that were not what they seemed, and turned out to have irreparable problems that were deal-breakers for me. I am very, very much hoping that this move will be my last for some time. I have a crazy next few weeks, finishing classes and assignments, packing and moving, starting a month-long internship, job-hunting, all while also working at my old job at the restaurant, trying to bring some money in rather than just have it fly out of my bank account faster and faster. Perhaps you think this is too much information – a lot of people don’t like to talk about money.  I think we should talk about money more, but I also think we should talk about most things more.

Anyways, this is to say that I’m sorry that I haven’t been posting much lately, but also to say that I can’t make any promises for the next bundle of weeks, that until at least May (or maybe June) rolls around, my life is chaotic, and I have very often failed at even making good meals for myself, let alone remembered to photograph them or have the time or energy to write about them afterwards.  I have struggled with the fact that I try to eat well and that I often preach things like “it’s easy!” and “it doesn’t have to take much time!” but when it comes down to crunch time for me, I don’t always follow through. I have eaten frozen pizzas and fish sticks and a lot, A LOT of take-out.  I feel no shame, but I do find it tiresome, and I am very much looking forward to a time when my life feels a little more normal again. Fortunately, the end of my school year will coincide closely with the start of my CSA again, and I look forward to that shaping my meals each week. In the meantime, I will share some photos of the few things I’ve made for myself in the last couple months. I hope to see you all again soon!

Winter is for casseroles…

Last night, I was thinking that I wanted to eat something really cozy and comforting for dinner, and I wanted it to include brussel sprouts.  I thought of a recipe for a savoury bread pudding that Carly recently shared with me, but I didn’t really want to use up all my eggs and milk.  Speaking of Carly and brussel sprouts, anytime brussels come up in conversation with me, Carly makes sure to let me know that she LOVES brussel sprouts, even though I am well aware of this fact because of the previous times she has emphatically told me so.  I am starting to believe that this is a ploy of hers to ensure that I always think of her when I’m having brussel sprouts; I don’t know why she desires this, but it must be true. So anyways, I didn’t want to make bread pudding, but I thought I could maybe make up a pasta casserole of sorts that would satisfy my comfort craving (“Comfort Craving” to be sung to the tune of a certain k.d. lang megahit).

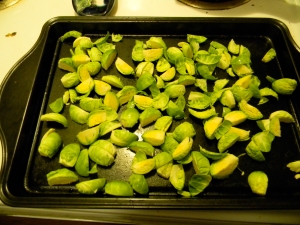
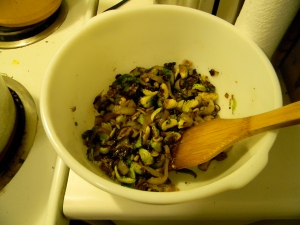
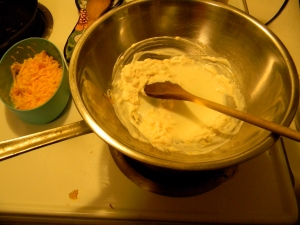
A couple weeks ago, Paul and I made up a casserole with cauliflower in it, so I decided that I would build off of the basic idea of that one and transform it to have other things in it – like brussel sprouts. A lot of brussel sprouts. So, I quartered some brussels and roasted them in olive oil, salt, and pepper until they were all charred and crispy and delicious. I caramelized some onions, and sauteed with them some mushrooms and garlic and spices (most notably, sage).  Paul grated a lot of cheddar (grating cheese is Paul’s most frequent kitchen duty, I hate doing it).  I also threw some chopped walnuts in with the veggies for this casserole – the bites of the finished product that had walnut in them were amazing, and I would add even more nuts next time. While I boiled the bowtie pasta, I made the lazyman’s cheese sauce in a double boiler over the pasta pot.  This sauce consists of a big glop of sour cream (or creme fraiche, or yogurt) into which you stir your grated cheddar until it becomes melty and incorporated and uniformly a sauce. Last night I added a splash of milk to thin it out.

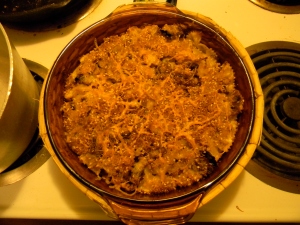
Meanwhile, I mixed together a breadcrumb topping.  It involved some breadcrumbs, smoked paprika, cayenne, and a bunch of sesame seeds.  At the last second I melted about a tablespoon of butter and mixed that into the breadcrumb mixture. I also got out my round casserole dish that I had never used, and greased it.  Oh, how I love this casserole dish! I bought it this past summer at Treasures in Muskoka – if you are ever around Huntsville or the west side of Algonquin Park, you gotta go to Treasures.  It’s on highway 60 and it is this amazing, crowded little thrift shop full of, well, treasures.  I have beautiful green glasses that I got from there, among other things, and this year I bought this brown tinted glass casserole dish with lid and a wicker holding basket.  I love it. I love coloured glass and I love wicker casserole dish holder thingys.

When the pasta was al dente, I drained it, and tossed it with the veggies I had earlier set aside (i.e. the onions, mushroom, brussel sprouts, etc.) and then added the cheese sauce and mixed until evenly coated.  I poured that into my greased casserole dish, topped with the breadcrumb mixture and some extra grated cheddar. Then I baked it at 400 for about 20 minutes, put it on broil for a couple minutes, and took it out (where I promptly and happily put it in its wicker warmer holder).

This pasta was SO GOOD. My nighttime bad-lighting photos do not do it justice, but then again, photos rarely do a casserole justice.  It was brussel-y and sage-y and breadcrumb-y and smoky and hearty and Paul and I nearly ate the entire dish full, but Paul put away his last half-plateful and I cannot wait to eat it with my dinner tonight. This, I suspect, will become a standby this winter.

I know what you’re thinking – “That Liz, any excuse to say the word ‘nips’!” but it isn’t like that, I swear. A little while back, I started buying goldfish crackers. This increased when the President’s Choice version came out not too long ago, which are shaped like penguins and just a little bit cheaper than the original.  I started buying these partly to try and break my Crispers habit, because while Crispers are certainly delicious, they are also full of all kinds of crap.  Surprisingly, goldfish/penguin crackers mostly are not.  I mean, they have some things in them that I wouldn’t use in my food at home, but not nearly as bad as the barrage of un-pronounceable things that many other crackers have in them.  And so a cheese-y cracker addiction began.  Sometimes I would opt for Cheese Nips (I swear, I’m not trying to advertise for any of these brands) if they were on sale.  But always, as I bought these, there was a voice in my head nagging me. It was saying “Stop buying these – save your money.  You know you can make these at home”.  This voice usually comes up in the cookie aisle, when I’m tempted to buy some crappy grocery store cookies and I talk myself out of it with images of freshly baked chocolate chip cookies.

Not too long ago, I never would have dreamed of making crackers.  Even though I’ve seen roommates make them before with ease.  But those are usually healthy crackers, and I just want a salty snack.  All the homemade crackers I pictured in my head were covered in seeds and made with spelt and all that – completely delicious for many purposes, but generally not the kind of crackers I buy anyways.   But then, almost a year ago now, there was THIS.  I remember reading that post and having my mind blown.  It looked so easy.  So few ingredients! And yet, I didn’t have a goldfish-shaped cookie cutter.  So I put off making them.  And oh yeah, I didn’t really have a good food processor either.  Always excuses, and I kept buying the cheesey store crackers.

Today, I came home from the grocery store to do my homework.  And I did homework, for a little while.  And then I remembered that every day last week I brought penguin-cheese crackers with me to school in my lunch, and I didn’t have any more for this week.  I remembered that I just bought 2 blocks of cheese on sale (300g block for 2 bucks! Pretty good deal!).  Without hesitation, I got up, and started grating cheese.  I knew if I started, it would come together in no time, and it did.  The only part of this recipe that takes any time is the actual baking, and that’s not really active time.  So make these for yourself, because holy crap, they are sooo easy and more delicious than any store version, and cheaper, and they only have SIX ingredients. Two of them are flour, and none of them are weird.  And really, truly, you don’t need a goldfish cookie cutter to make them.

Cheese Crackers a la Goldfish (adapted from Smitten Kitchen, who adapted it from The Lee Bros.)

– 1 1/2 cups grated old cheddar cheese (really pack it in those cups, the more cheese the better. If you want to weigh it, its supposed to be 6 ounces of grated cheese)

-4 TBSP of butter (I cut mine into little cubes, and softened a bit in the microwave)

-1/2 cup whole wheat flour

-1/4 cup regular flour

-1/4 tsp. onion powder (optional – you can barely taste it, but I think it adds character)

-1/4 tsp. salt (you can put less – these are not as salty as the store-bought kind, but they are still salty.  I’m a salt fiend, so if you want less, go for it)

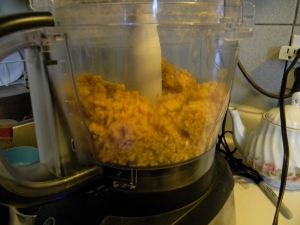
Put all the ingredients in a food processor and let blend until it forms a ball of dough. This should take about 2 minutes.  THIS was the craziest thing ever! When I turned on my food processor, it just looked like bread crumbs, and I thought there was no way it would come together into a ball of dough.  Did I miss something? Am I supposed to add some water? I checked the recipe again and read through the comments.  Nope, no water. I resisted the urge to add some right away and decided to (gasp!) follow the directions. It was nuts, I’ve never seen this before.  A mix of totally dry and crumbly bits started to get more clumpy, and more clumpy, until suddenly it was one big ball of dough and my food processor was working hard to push it around in circles.  Crazy! So, have faith in this dough.

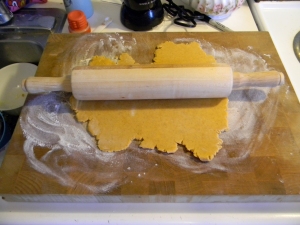
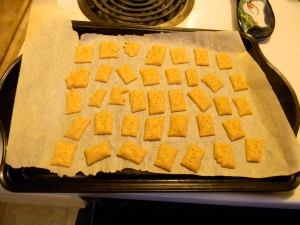
Roll it out (on a lightly floured surface with a floured rolling pin) until it is 1/8 inch thick.  I never know how thick my dough is, so just try and get it fairly thin, yet thick enough that you are still actually able to pick it up off your rolling surface. Since I don’t have any cookie cutters, I just cut my crackers into squares, placed them on a parchment-lined cookie sheet, pricked them a few times with a fork (to let the steam escape) and misted them with water.  In my insanely-fast-super-hot oven, these only took about 5-6 minutes per batch, but the recipe said 12-15.  So keep an eye on them.  Take them out when they are starting to be golden at the edges, but before they burn (duh).  Transfer to a wire rack to cool.  Keep in an airtight container at room temperature.  Sometimes things like this go soggy when they are in containers, I will let you know if that happens.

I ate about a million of them while I baked, and still ended up with about 80 1-inch square crackers, so pretty good.  They cost me about $1 worth of cheese to make, and the rest of the ingredients I always have and so I count that cost as pretty much negligible. So all in all, a great deal. Even if “I love homemade-cheesey-square-crackers cuz they’re so delicious!” doesn’t quite flow off the tongue in the same way. Enjoy!

Forgive the Gil Scott-Heron reference (on second thought, don’t excuse it), but when I first ate the result of the recipe I’m going to share with you, I proclaimed to my classmates “OH MAN, this is a lunch revolution!!!”.  Presumably they found me both charming and decidedly nuts.

Before I go any further, I have to give credit where credit is due.  I did not think this up on my own.  I didn’t actually think it up at all; instead, someone mentioned a packed-lunch standby of hers to me in passing, and I flipped right out. Then, I proceeded to yell excitedly about it to anyone who would listen, and most people humoured me but didn’t care that much, except for Carly, who said repeatedly: “that is SO smart. that is so SMART. that is SO SMART” (add something else onto the list of why I love Carly: she is equally enthusiastic as myself about revelations in the realm of packed lunches, in spite of the fact that she currently does not have to pack a lunch to go anywhere).  Anyways, the point is, thank you very much to Ruth for introducing me to this idea so casually over some afternoon wine in Kitchener.

Without further ado, I bring you your new lunch: homemade frozen burritos.  If you didn’t just say to yourself “holy shit!”, then you probably don’t care that much about this. But me, I freaked. Homemade frozen burritos! In the store they have frozen burritos that you buy and microwave and eat! But they are generally not that good! And sometimes they are really expensive! I love burritos! Burritos are one of the two things I’m always in the mood for! The other is roti, which is a similar concept! Why haven’t I thought of making burritos and freezing them?!

Ruth explained to me, in brief, her method: she makes a bunch of burritos, but instead of layering in the filling like you would normally, she mixes everything together in a big slop – beans, cheese, veggies, etc. just all together.  I guess this will make it freeze/thaw/cook better and more evenly.  Makes sense to me! Then, she said, she individually wraps them in little parchment paper bags, and freezes them. Then, when its time to pack a lunch, she just grabs one, brings it with her, and microwaves it for 2 minutes or so when its chow-time. BLAM-O!

And so, the week before I went back to school for second semester, I spent an hour making myself a batch of burritos to freeze.  It really only took an hour start to finish I would say, which I think is well worth it given that I got 6 lunches out of it.  In my burritos:

-one can of my favourite refried beans

-homemade salsa     -cubed, roasted sweet potato     -chopped and sauteed onion, carrot, and garlic

-frozen corn from my CSA that I froze in August      -grated cheddar cheese     -cilantro and green onions

-a chipotle pepper, also from my CSA, which was surprisingly HOT

-a bit of sour cream, and seasonings of salt, pepper, cumin

I mixed all that together, and then assembled.  I used 10-inch whole wheat tortillas, and heated them for about 15 seconds to make them more pliable, then scooped in the filling and rolled them up.  I made little parchment paper bags by stapling sheets of the paper together (note to self and to you: do not put the paper bags in the microwave later on, staples are made of metal and that is bad in the microwave) and then put them into freezer bags.  I did a sort of bad thing and put them straight into the freezer when they were still warm, which means that they got some condensation from the steam that may ultimately mean a bit of freezer burn, but oh well.

On Tuesday I had my first day where I packed a lunch, and I excitedly brought one of my burritos.  The best thing is that since they’re frozen rock-hard, I don’t need to bring an ice pack or anything like that, because it stays cold until my lunch time.  The other best thing is not having to wake up and go “Dang, I have nothing to bring for lunch!”.  The other best thing is that they are delicious.  I microwaved that baby for 2.5 minutes total, flipped it over once to get it cooking evenly, and it was so good.  Keep in mind, like most frozen burritos, by the time the microwave was done it is more fork-and-knife material then handheld, but that’s okay.  It was so satisfying.  A filling, homemade, healthy, and cheap lunch. Score! Happy New Year to lunch!

Witch’s Brew

Normally I would start out with a lot of apologies and explanations for why I haven’t posted in so long.  But you know, bygones. It’s a new year, and does it really matter? I’m here now. I will try and post a bunch in the next few days, because I made a lot of homemade gifts this Christmas season, and now that they’ve all been received by their recipients I can post about them without ruining any surprises.  In the meantime, though, I’m here to tell you about making beer. BEER.

When I was really young, my dad used to homebrew beer.  I only have vague recollections of his equipment, and of course I was too young to sample it.  When my little brother was born, he stopped brewing, but since my brother is now away at university, he’s started up again, and this time he’s delving even deeper into the art and science of brewing beer.  He tells me that back in the day he brewed from malt extract, rather than from the malted barley itself.  I gather that using malt extract would be like making lemonade from a frozen can of lemonade concentrate, whereas working from the barley itself is more like squeezing all those lemons yourself and making simple syrup, etc. When you brew from the barley rather than the extract, you also have way more freedom in terms of how you want your beer to end up tasting – just like cooking things from scratch affords you more control with your food.  So this Christmas, when I was at my dad’s house, we spent a day brewing beer.  He had asked me in advance what kind of beer I’d like to make, and I decided on a coffee porter.

Mixing up the barley mash.

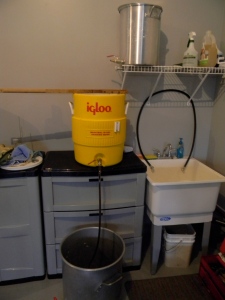
The basic procedure, as far as I can remember, goes like this. You start with your big sack of malted roasted barley.  My dad gets his from a guy in Windsor, Ontario.  Depending on what you are making, you may have a mix of barley that is more darkly roasted with lighter roasted, etc. In this case, my dad got a bag of barley that was kind of pre-mixed for making porter.  So you heat some water, you mix it with the barley, you really smash it around and mix it, there’s a bunch of stuff with adding water and taking temperatures that I don’t remember really.  Eventually you start draining the liquid out into a big pot.  My dad crafted his equipment himself, and so he used this big yellow water cooler for mashing the barley, and he put a false bottom in it that strains out the big barley pieces as it drains through the nozzle thing. Very technical terms I’ve got here, eh?

I keep forgetting what this mixing wand tool thing is called. I prefer to call it the Mash Tongue.

So you drain it out, and you do it slowly through a hose and try to avoid getting any big chunks of barley in your pot.  This whole process takes longer than it sounds – around an hour or so just to mash and drain it usually.  Then you heat that brew up.  My dad has a big propane burner that he sets up in the garage (where he does all his brewing so that his house doesn’t smell like hops all the time).  You let it come to a boil, and you boil it for an hour.  In the last 15 minutes you add your hops.  For porter, we had two different kinds of hops to add.  One was added at the 15 minute mark, and one was added a little closer to the end – the hops added at the end will not get cooked as much and will thus offer more hoppy flavour to the finished product (i love hops).

Homebrew station setup.

After boiling it, you drain it out of the pot into the receptacle that it will ferment in (in this case a sterilized bucket).  You have to drain it nice and slowly again, and you want a lot of air to get in there, because air is good to feed the yeast.  Then you add the yeast, which my dad had already been brewing up since the day before, in a fruit jar on the counter. It was extra oozy!

Draining out the barley mash into the pot for boiling.

Basically then you let it ferment for 10 days or so.  If you know anything about yeast, then you know that it has to be warm for yeast to do its work, so you ferment in a warm place.  Then you start to chill it and age it.  Then you drink it! In this case, since we were making coffee porter and not just regular porter, you add a cup of espresso after it ferments.

Relaxing in lawn chairs and watching a pot boil.

I haven’t tasted this beer yet, but my dad is going to try and bottle some and send it to me somehow.  He tasted it when it was done fermenting, and said that even when it was warm that it tasted great.  I will let you know how it turns out! Brewing beer was fun, though really cold when you’re spending a number of hours in a garage in the winter.  I kept putting my face over the boiling pot of beer to warm up, and I’m pretty sure my face was all burnt in the days after, because I was rosy cheeked for a few days.  There are a lot worse things, lemme tell you.

Into the bucket for fermenting!

ADDENDUM – courtesy of my Dad, some of the more scientific stuff that I forgot:

The grain blend that the guy in Windsor sell and grinds was my recipe for Porter. He weighs it out and grinds it cause his grinder rocks!

The yellow cooler itself is called the “Mash Tun”, the process of steeping the grains to change the starch to sugar being called “mashing”.  The wooden tool is called the “Mixing Wand Tool Thing”

and

There were some hops added right when it started to boil, these are the ones that will contribute bitterness but no flavor. Boiling for a long time means that you extract the bittering compounds but boil off the flavor compounds. Adding hops near the end has an opposite effect, not much bitterness and hopefully you keep the flavor.

I can tell you that I think it tastes great. It’s just about fully carbonated. I think I’ll be bottling soon.